December 15, 2025
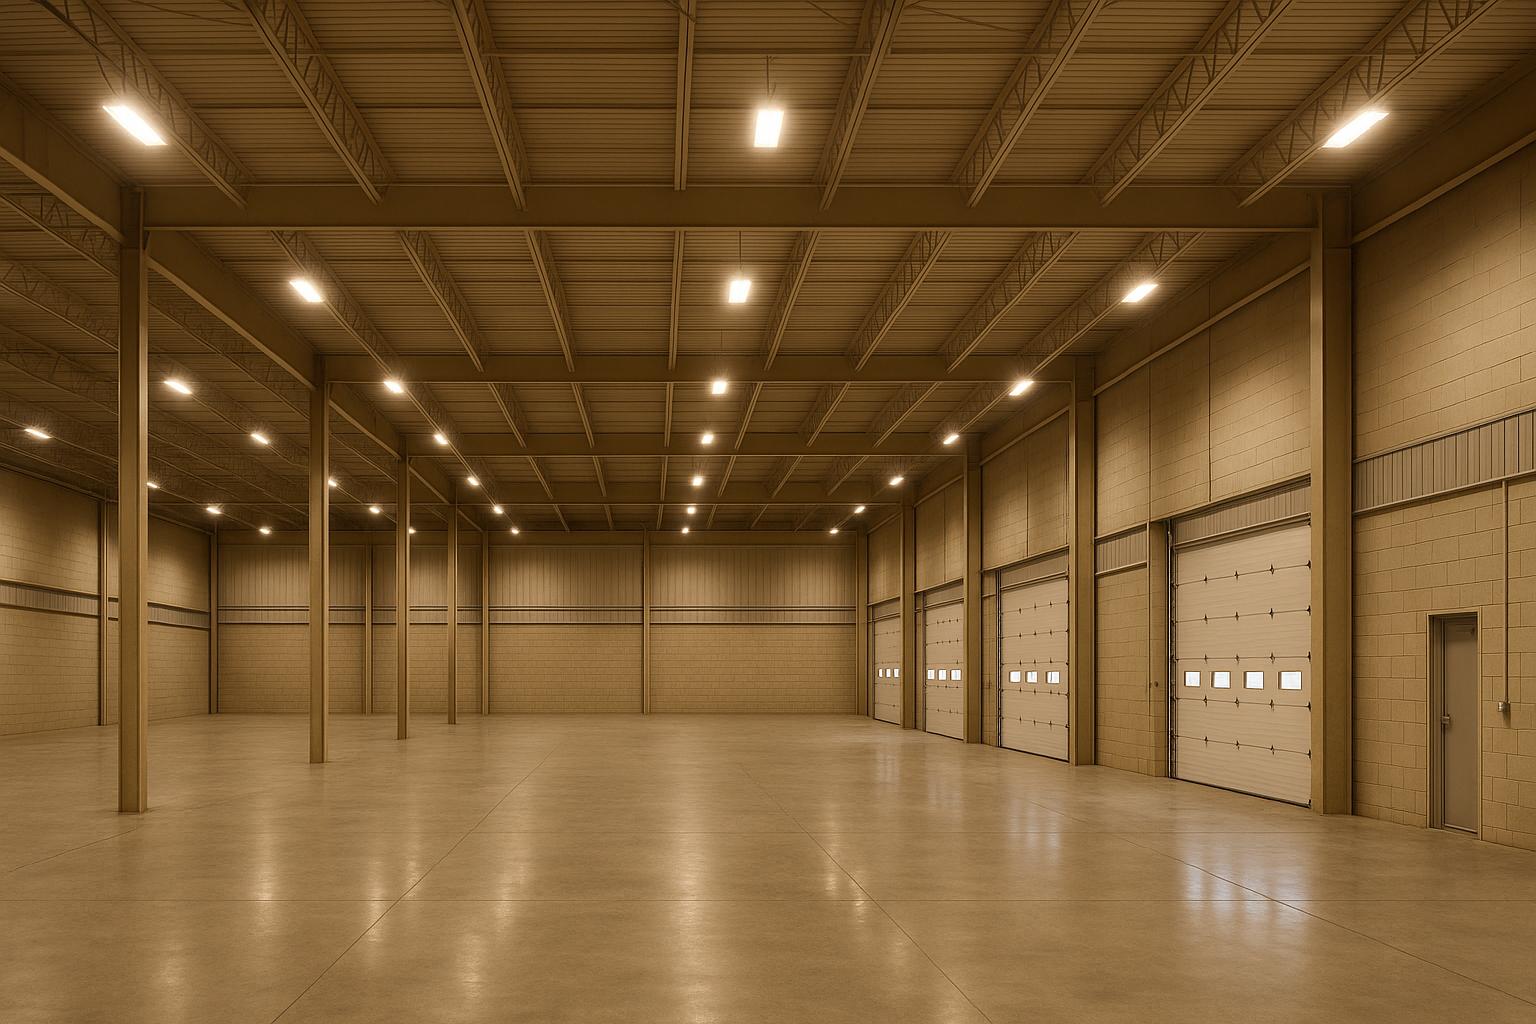
Switching to LED lighting is a smart move for Texas businesses looking to cut energy costs. Lighting can account for 20% of a facility's electricity bill, and outdated systems waste money. LED retrofits reduce lighting energy use by 40–75%, lower maintenance costs, and improve efficiency. For example, a 50,000-square-foot office in Austin cut energy use by 62% with a payback period of just 1.8 years. Here's how to get started:
With proper planning and available rebates, most businesses see payback periods of 1–3 years. Partnering with experts like Texas Lighting Consultants can simplify the process and ensure compliance with local energy codes.
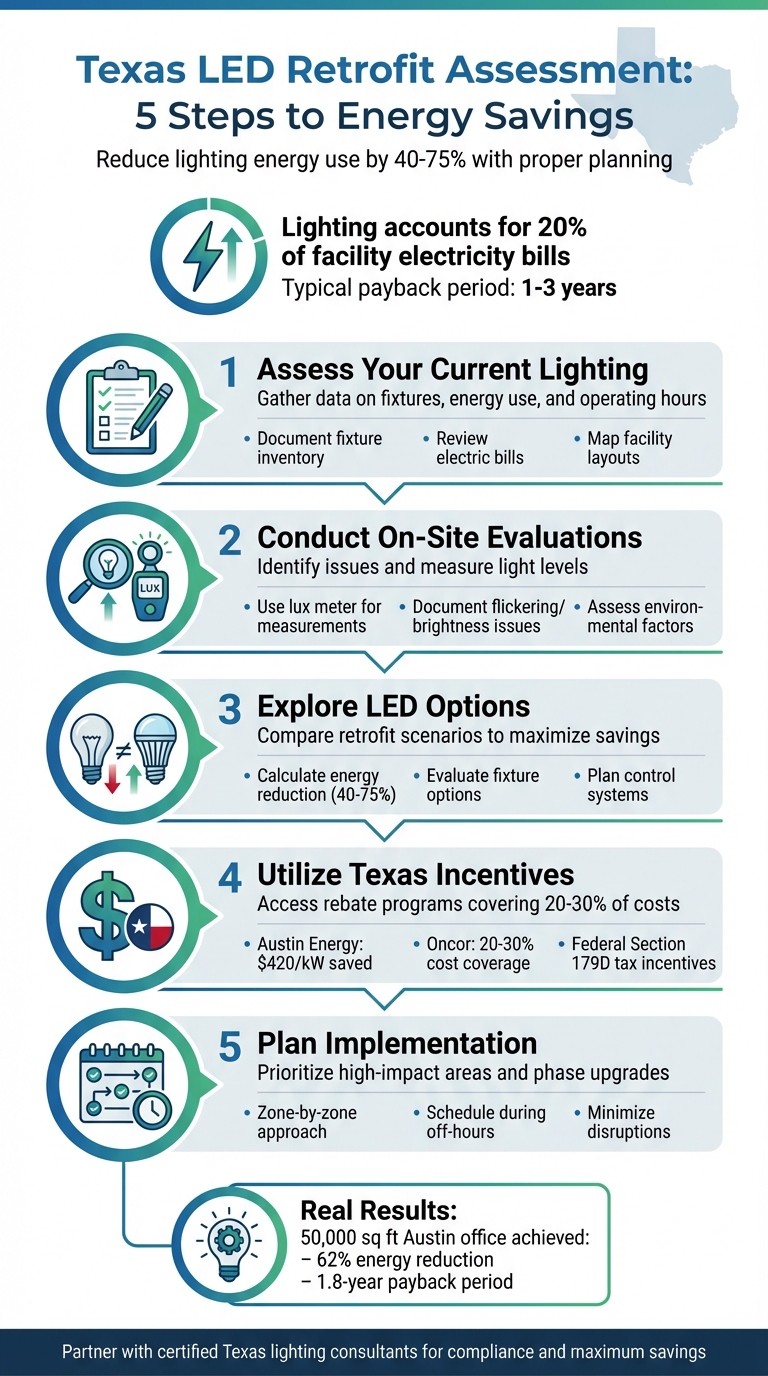
5-Step LED Retrofit Assessment Process for Texas Businesses
To ensure your lighting assessment is thorough and effective, start by gathering key data about your facility. This information will help you calculate energy usage accurately and identify areas where retrofits could make a difference.
Begin by compiling your facility’s electric bills, operating schedules for different zones, and records of the electrical infrastructure, including voltage requirements and control systems. This data helps you understand your current energy consumption and costs. Use building layouts or floor plans to map out where fixtures are located and how spaces are utilized throughout the day. This step ensures you have a clear picture of your facility’s lighting needs.
Document every fixture, both inside and outside your facility. For each one, note the type, service area, quantity, wattage, estimated burn hours, and purpose. Verify this inventory by reviewing facility drawings and conducting on-site walkthroughs. Take photos of fixtures to use for before-and-after comparisons and rebate applications.
Pay close attention to any existing issues, such as flickering lights, inadequate brightness, glare, or poor placement. Also, consider environmental factors like extreme temperatures, moisture, or chemical exposure, as these can affect how well fixtures perform and how long they last. Keeping detailed records of your fixtures is critical for developing effective LED retrofit plans that save money and improve lighting quality.
If your facility is in Texas, be aware of specific utility program requirements. For example, Austin Energy requires pre-approval for projects. Applications must include detailed project specifications and demonstrate at least a 10% energy reduction. Additionally, all LED products must either be ENERGY STAR certified or listed on the DLC (DesignLights Consortium) list. Installations must be carried out by licensed contractors, and post-installation verification is required, including submission of invoices, equipment specifications, and disposal certificates.
To simplify the process, Austin Energy offers a Trade Ally Network of qualified contractors who can assist with project implementation and ensure compliance with these requirements.
Once you've gathered baseline data and completed your fixture inventory, it’s time to walk through your facility to assess the actual lighting conditions. This step uncovers issues that might not appear in your initial data and highlights the best opportunities for upgrades.
Start by walking through each area of your facility. Talk with plant managers or maintenance staff to understand how different spaces are used throughout the day. Take detailed notes on fixture types, wattages, and any existing controls in each zone. Using standardized data collection forms can help you stay organized and ensure no critical details are overlooked.
Take photos to document the current state of your lighting. These will be useful for before-and-after comparisons. During your walkthrough, look for common issues like flickering lights, burned-out bulbs, insufficient brightness, or excessive glare. Also, consider environmental factors - such as high temperatures in manufacturing areas or moisture in loading docks - that can impact the performance and lifespan of your fixtures.
Use a lux meter to measure the actual illumination levels in your facility, recording the results in footcandles or lux. Compare these readings to workplace lighting standards: for example, corridors typically require 20 lux, general office spaces need about 200 lux, and areas where detailed work is performed may need 500 lux or more.
Assess light quality using a checklist. Look for issues like glare along sightlines, reflections on work surfaces, or overly shiny objects that could distract employees. Check whether lighting transitions are smooth or if workers frequently move between overly bright and dark areas. Make sure fixtures provide even light distribution and are positioned to minimize shadows or strobing effects. Also, note the color temperature of your current lighting. Warmer tones (2700K–3000K) are ideal for customer-facing spaces, while cooler tones (4000K–5000K) are better suited for task-oriented areas.
These measurements will guide your next steps, including evaluating control systems and occupancy patterns.
Take inventory of all existing control systems, such as dimmers, timers, and sensors. Test their functionality and ensure they are compatible with LED fixtures. If older dimming systems are incompatible, they’ll need to be replaced.
Pay attention to how spaces are used throughout the day. Identify areas where motion sensors could save energy based on occupancy patterns. Additionally, evaluate the availability of natural light by examining window locations, orientations, and the use of blinds or curtains. Spaces with ample sunlight are excellent candidates for daylight harvesting controls, which dim fixtures automatically when there’s enough natural light.
In states like Texas, where sunlight is abundant, carefully analyzing daylight patterns can lead to significant energy savings while maintaining comfortable lighting levels throughout the day.
This detailed on-site assessment provides the foundation for analyzing energy savings and the cost-effectiveness of retrofitting your lighting systems.
Once you've completed your on-site assessment, the next step is translating your findings into projected energy savings and determining how quickly your retrofit investment will pay off.
To calculate annual energy consumption, use this formula:
Annual kWh = (Existing System Watts) × (Hours of Operation) × (Number of Fixtures) ÷ 1,000.
Make sure to use the actual wattage of your system, not just the catalog numbers, since ballast losses can increase rated wattage by 10–15%.
Operating hours can vary by zone. For instance, production areas might run continuously, while office spaces typically operate around 2,500 hours annually. Let’s take a warehouse as an example: with 100 fixtures, each drawing 458W (including ballast losses) and running 4,380 hours a year, the total energy usage would be about 200,604 kWh. At an electricity rate of $0.12 per kWh, this adds up to annual lighting costs of approximately $24,072. For more precise estimates, consider using data loggers or conducting occupancy studies.
Also, don’t forget to account for demand charges, which can add an additional $10–20 per kW each month.
Once you've calculated your current costs, explore how LED upgrades can reduce energy consumption and maintenance expenses. Evaluate various retrofit options tailored to your facility’s needs. For example, replacing a 400W metal halide fixture with a 150W LED alternative can deliver comparable light output (around 20,000 lumens) while cutting energy use by roughly 67%, including ballast losses. Adding advanced lighting controls - like occupancy sensors or daylight harvesting systems - can further reduce energy usage by an additional 20–30%.
To make informed decisions, create side-by-side comparisons of your options. Highlight each scenario’s energy consumption, cost savings, and maintenance reductions. Be sure to include both upfront costs and long-term savings to help prioritize which areas to retrofit first.
After mapping out your retrofit scenarios, it’s time to analyze the financial benefits, including available incentives. For businesses in Texas, several programs can make LED retrofits more affordable. For example:
Most of these programs require pre-approval, so it’s a good idea to work with an approved service provider to simplify the application process and ensure compliance with program requirements. Additionally, federal tax incentives under Section 179D may further offset the costs of your project.
To calculate the payback period, divide your net investment (after applying rebates and incentives) by your annual savings. Many businesses in Texas see payback periods of just 1–3 years, making LED retrofits one of the quickest ways to improve energy efficiency.
Once you've completed your energy savings analysis, the next step is putting customized retrofit solutions into action.
Focus on areas with high energy consumption and long operating hours. Spaces like parking lots, warehouses, and production floors often rely on outdated, inefficient lighting systems, making them ideal candidates for upgrades. Use your baseline data to calculate energy use for each area. Pay special attention to zones where better lighting could improve safety and productivity, such as manufacturing floors and loading docks. By weighing potential energy savings alongside benefits like enhanced visibility and fewer accidents, you can identify the areas where retrofits will have the greatest impact.
Design lighting solutions based on the specific needs of each space. For office areas, go for cool, daylight-like lighting - around 4,000 to 5,000 Kelvin - with enough brightness for general tasks. Warehouses and production zones require higher-output fixtures, providing 5,000 to 6,500 Kelvin and excellent color rendering for detailed work. In retail or hospitality environments, warmer tones between 2,700 and 3,500 Kelvin help create a welcoming feel and showcase products effectively.
To optimize energy use, integrate lighting controls like occupancy sensors for low-traffic areas and daylight sensors where natural light is available. Select fixtures that match the space's ceiling height, task requirements, and existing mounting systems to avoid unnecessary expenses. Implement these tailored designs in stages to keep operations running smoothly while upgrading critical areas.
Avoid major disruptions by phasing the retrofit process. A zone-by-zone approach ensures that most of your building stays operational while upgrades are confined to specific areas. Schedule activities that might cause interruptions - like replacing high-bay fixtures or upgrading electrical panels - during off-hours, weekends, or planned maintenance periods. Many large facilities have successfully used this phased approach, scheduling work during low-activity times to reduce impact.
Build in extra time for inspections, material delays, or unexpected challenges. Keep staff informed about which areas will be affected and when, and assign a dedicated point of contact to address any concerns. For environments like schools, planning major upgrades during summer breaks or holiday closures can significantly limit disruptions to daily operations.
Switching to LED lighting through a retrofit can seem like a complex process, but breaking it down into clear steps makes it manageable. It starts with gathering baseline data, conducting a detailed on-site evaluation, and performing a financial analysis. By doing so, you can identify energy-saving opportunities that often lead to a payback period of just 1–3 years.
Start by reviewing your current lighting setup - take inventory of fixtures, measure light levels, and assess the effectiveness of existing controls. Make sure your plans align with Texas-specific energy standards. Don’t forget to research financial incentives offered by local utilities, as these can significantly reduce costs. For instance, a 50,000-square-foot office in Austin managed to cut its lighting energy use by 62%, achieving a payback period of only 1.8 years after applying incentives. With these steps in place, the next move is to put your plans into action, and expert help is readily available to guide you through the process.
Texas Lighting Consultants specializes in end-to-end LED retrofit services that simplify the process and maximize savings. As a HUB-certified, woman-owned business, they offer free comprehensive lighting assessments, handle rebate documentation, and manage everything from design to installation. Their team ensures compliance with Texas energy codes while helping you take full advantage of available incentives, minimizing upfront costs. Reach out to schedule your free assessment and see how a tailored LED retrofit can help your business cut energy costs and improve efficiency. With expert guidance, Texas businesses can make the switch to LED lighting simple and cost-effective.
Switching to LED lighting can dramatically reduce energy use - by as much as 70% compared to traditional lighting - which translates to lower utility bills. Beyond the savings, LEDs last far longer, meaning fewer replacements and reduced maintenance costs.
LEDs also deliver superior light quality, improving visibility and creating a more comfortable environment in workspaces. On top of that, they contribute to environmental responsibility by cutting energy consumption and lowering greenhouse gas emissions, making them a smart, eco-conscious choice for businesses throughout Texas.
Businesses in Texas can cut costs on energy-efficient LED lighting upgrades by tapping into local incentives like rebates and grants from utility providers, including Austin Energy and Entergy Texas. These programs typically reward businesses financially based on the energy savings achieved through upgrades, such as improved lighting systems and controls.
To take advantage of these opportunities, businesses should apply for rebates before starting installations and ensure that the equipment meets established quality standards like ENERGY STAR or DLC certifications. Additionally, some programs offer extra rebates tailored for small businesses, non-profits, and houses of worship, making it even more affordable to enhance energy efficiency while saving money.
When performing an on-site lighting assessment, start by identifying your specific lighting objectives and evaluating how the current setup aligns with those goals. Take a close look at the types of fixtures in use, their positioning, and whether they deliver sufficient coverage without creating problems like glare, flickering, or unwanted shadows. It's also important to measure illumination levels and ensure they meet safety requirements and energy efficiency guidelines.
Don't overlook external factors such as light spilling onto neighboring properties, which could violate local regulations. Another key step is spotting any maintenance concerns and checking if the fixtures are easy to access and service. Addressing these elements can help keep your lighting system running smoothly and efficiently over time.
We’re a HUB-certified Texas lighting company specializing in surveys, calculations, and installations for government and contractor projects.
© 2025-26 | Texas Lighting Consultants | All Right Reserved.