January 31, 2026
Creating a lighting project timeline ensures your project stays on track, avoids delays, and meets energy-saving goals. Here's how to do it:

6-Step Lighting Project Timeline Development Process
Before diving into your project timeline, it’s crucial to define your facility's current state and set measurable targets. This groundwork ensures your schedule is built on reliable data, not assumptions.
Begin by thoroughly documenting your existing lighting system. Create an inventory of all fixtures, lamp types, ballasts, and control components for both indoor and outdoor areas. Don’t rely on memory or outdated records - take photos from multiple angles to capture the actual condition of your lighting setup.
Next, evaluate your light level performance using a light meter. Measure in foot-candles at task height, such as desk level, where work is performed. To get accurate readings, let your lighting system warm up for at least an hour before taking measurements. This step helps pinpoint areas that are either over-lit or under-lit.
Record your operational patterns by tracking the actual hours your lighting is used. Avoid simply using standard business hours; include cleaning crews, security shifts, and exterior lighting schedules like dusk-to-dawn cycles. Gather at least two weeks of non-holiday data to capture typical usage patterns.
"With high-level information we can create a budget and ROI, but to actually create a firm price, a lighting contractor will need to walk the space." – Bobby Graham, Chief Growth Officer, FSG
Factor in environmental conditions like ceiling heights, room dimensions, and surface colors. For example, darker walls may require double the lumen output compared to lighter surfaces to meet the same foot-candle target. Look for obstructions such as partitions or modular furniture, and inspect for issues like fixture degradation, failed components, or hazards like heat sources and voltage irregularities.
This detailed assessment lays the groundwork for setting clear and measurable targets.
Once you’ve assessed your current setup, establish specific, quantifiable goals. These should focus on reducing energy use, cutting maintenance costs, and improving lighting quality. Prioritize these objectives to shape the scope of your project.
Use your facility type and square footage to set realistic targets. For instance, offices typically need 50–75 foot-candles for tasks like reading and writing, while hallways may only require 10–20 foot-candles. In hospitals, labs might demand 75–100 foot-candles, while general areas can function with 10–15 foot-candles. These benchmarks, based on IES (Illuminating Engineering Society) standards, provide a reliable starting point.
Your goals should include specific numbers. For example, you might aim for 50 foot-candles in all office workspaces. Leveraging LED technology with advanced controls can cut energy costs by up to 80%, so set ambitious yet achievable targets. Don’t forget to account for materials, labor, disposal of old equipment, and potential financial perks like tax credits or utility rebates in your budget.
Identify any implementation challenges early on. For example, if work needs to happen after hours or on weekends - common in retail or educational facilities - this could increase labor costs and extend timelines. Also, consider lead times for LED components, many of which are custom-made or shipped from overseas, requiring extra buffer time in your schedule.
"When it comes to LED lighting the phrase, 'you get what you pay for' is unfortunately very accurate." – Stouch Lighting
Finally, hold a discovery meeting with all stakeholders to document their needs and concerns. Request photometric layouts from suppliers to ensure proposed products meet your light level requirements before making purchases or finalizing your timeline.
Breaking your lighting project into clear phases helps define responsibilities, monitor progress, and avoid unnecessary delays.
Lighting projects typically unfold in five stages: Planning/Discovery, Design, Procurement, Installation, and Post-Installation. Each stage builds on the last, with specific deliverables paving the way for the next.
"Lighting is not merely about brightness - it's about creating transformative experiences that enhance and define spaces." – Commercial Lighting Industries
By clearly defining these phases, you can identify task dependencies and streamline your project timeline.
Recognizing how each phase relies on the others is key to avoiding costly scheduling issues. For instance, procurement can't begin until the design is finalized, and installation depends entirely on timely material delivery. Custom LED fixtures, especially those manufactured overseas, often have lead times of 8 to 12 weeks - this needs to be factored into your schedule.
Some tasks must happen in sequence, while others can overlap. For example, while design approval is essential before ordering equipment, you can simultaneously prepare the site, schedule electricians, and secure permits. Planning these dependencies ahead of time ensures that installation crews aren't left idle and that custom fixtures are ready when needed.
"No successful project can ever be pursued without proper planning, and the same applies to custom hospitality lighting." – PTY Custom Lighting
Once you’ve divided your project into phases, the next step is to define milestones - key markers that signal major completions. These milestones, often set as zero-duration events, help you track progress and identify potential delays early on. They also play a crucial role in resource allocation and risk management for the steps that follow.
Tracking how quickly clients approve deliverables can highlight bottlenecks. For example, projects where client approvals happen within 48 hours tend to finish 20% faster. Additionally, including a two-day buffer for inspection failures can significantly boost confidence in your schedule, raising it from 70% to 95%.
Milestones should align closely with the project phases you outlined earlier. For instance:
"Projects don't fail because they lack a timeline. Rather, they suffer when that timeline doesn't reflect reality." – David Case, Founder and President, Advastar
For setting deadlines, consider using the Program Evaluation and Review Technique (PERT). This method calculates timelines based on three estimates: optimistic, most likely, and pessimistic. The formula is simple:
(Optimistic + 4 × Most Likely + Pessimistic) ÷ 6.
Don’t forget to factor in supplier lead times when building your timeline. Also, identify tasks on the critical path - the sequence of activities that determines the overall project duration. Any delay in these critical milestones will directly impact your project’s completion date.
"In my experience, most people assessing the amount of time required to complete a task are overly optimistic. The value of using PERT charts is forcing them to think of the estimate in three ways - best case, worst case, and most likely." – Michael Campbell, Consultant and Adjunct Professor, St. Edward's University
With milestones and realistic deadlines in place, you’ll be well-prepared to tackle resource planning and contingencies in the next phase.
A project timeline is only as reliable as the resources supporting it. To keep things on track, you need to align resource availability with the actual demands of the project. And that means digging deeper than just knowing who's on the team - you need to account for vacations, meetings, and other commitments that might limit availability. Without this alignment, staying on schedule becomes an uphill battle.
Start by identifying long-lead items early in the planning process. In many lighting projects, specialized fixtures or electrical components can take weeks - or even months - to manufacture and ship. A procurement log can help you track these items and determine when dependent installation tasks can realistically begin. For instance, in 2021, delays in long-lead items caused project schedules to slip by several weeks.
But availability alone isn't enough; suitability matters just as much. In 2024, Hello Electrical faced a challenge when their available technicians lacked the specific skills needed for a project. By reallocating resources and bringing in an external consultant, they avoided costly delays. Using a skills matrix to match certifications and technical expertise to specific tasks can be a game-changer, especially for complex systems.
If your team is stretched thin, consider resource leveling to extend the timeline and prevent burnout. Alternatively, resource smoothing can shift resources to non-critical tasks while keeping the final deadline intact. Preston Guyton of Digital Maverick discovered that his database managers were far more productive during their first four hours of work. By scheduling high-stakes tasks during these peak performance windows, the company boosted conversion rates by 34% in just six weeks.
Once resources are allocated, make sure to build in buffers to handle the unexpected.
Construction schedules often underestimate task durations by at least 20%. To counter this, use the Critical Chain Method to add time buffers, especially for tasks that share key resources. Andrew Bates, COO of Bates Electric, found that including a two-day buffer for potential inspection failures increased schedule confidence from 70% to 95%.
"Buffer time is something I've learned to bake in. Sometimes people get sick or priorities shift, and tasks always take a bit longer than you expect." – Avadh Nagaralawala, Control System Engineer, Caterpillar, Inc.
Set aside 10%–15% of the total project cost to cover unforeseen issues like material shortages, permitting delays, or unexpected site conditions.
"Having a line item of 10 to 15 percent of the total project cost set aside for unexpected conditions is not money wasted; it is money insured against exactly these things." – Michael Benoit, ContractorBond.org
Another factor to monitor is decision velocity - how quickly clients approve deliverables or respond to questions. Projects where clients approve within 48 hours typically finish 20% faster because trade partners spend less time waiting for answers. Additionally, maintaining contracts with multiple suppliers for critical materials like luminaires or wiring can help avoid delays caused by a single vendor's supply chain issues.
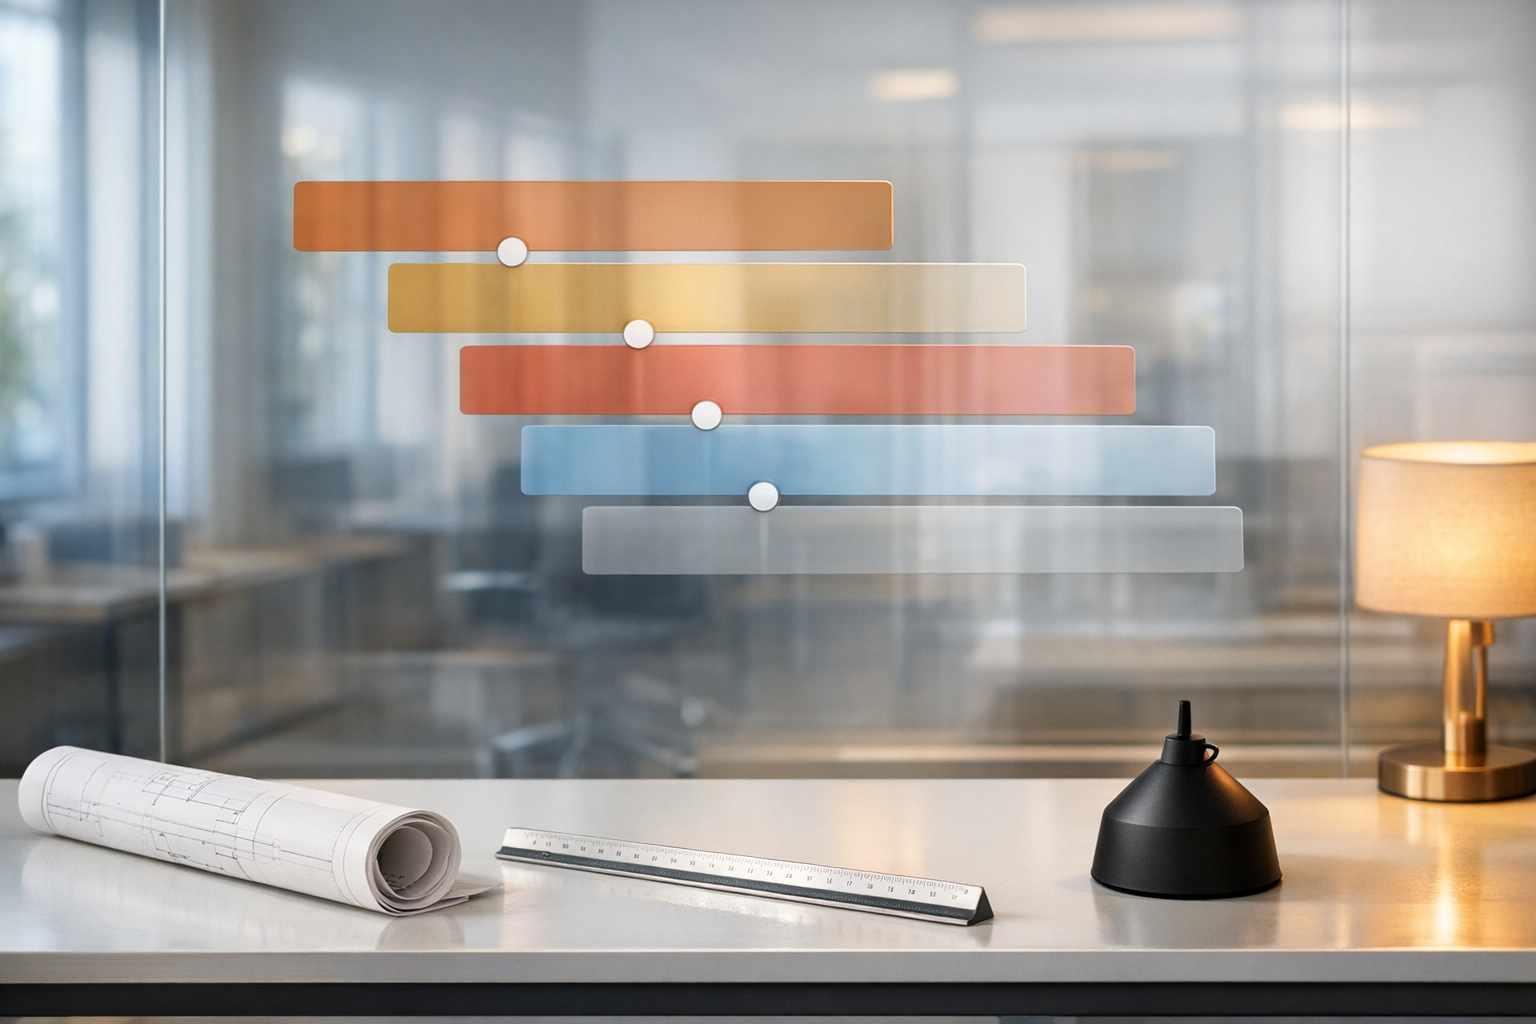
Once your resources are allocated and buffers added, it’s time to turn your plan into a Gantt chart. This tool visually maps out tasks, their durations, and how they connect. Essentially, it transforms your task list into a timeline that’s easy to follow.
A Gantt chart typically includes several key components: a vertical list of tasks, a horizontal timeline, bars showing task durations, lines indicating dependencies, milestone markers, task ownership labels, and shading to show progress. For lighting projects, you’ll want to include tasks like conducting a site audit, submitting specifications, ordering long-lead items (e.g., custom fixtures), completing installation phases, and performing final inspections.
"The Gantt chart is a great visual representation for stakeholders to highlight when value will be unlocked and the clear critical path to unlocking that value." – Marisa Browne, PMP-certified project manager, Traffix
When building your Gantt chart, focus on task dependencies. For example, fixture delivery must happen before installation can begin. Be cautious not to over-link tasks - only connect those that truly depend on each other to avoid creating an overly rigid schedule.
To make your chart even clearer, consider using color coding.
Color coding can make your Gantt chart easier to read by visually separating project phases, task types, or team responsibilities. For example, you might use blue for procurement tasks, green for installation, and orange for inspections and approvals. This allows stakeholders to quickly identify specific phases.
If multiple contractors are involved, assign each one a unique color. This way, everyone can immediately see which tasks fall under their scope. This approach helps streamline coordination meetings and ensures that responsibilities are clear.
Once your chart is visually organized, the next step is to identify the critical path.
The critical path represents the sequence of tasks that directly determines your project’s completion date. Any delays in these tasks will push back the final deadline. Most modern Gantt chart software highlights the critical path - often in red - so it’s easy to spot.
"I always start by looking at the critical path first - that red line tells me immediately where the project can succeed or fail." – Paul Koetke, Consultant
Tasks outside the critical path have "float" or "slack", meaning they can tolerate minor delays without affecting the overall schedule. Understanding this distinction allows you to manage setbacks in non-critical areas without jeopardizing the project timeline. After pinpointing the critical path, set a baseline - a locked version of your original schedule - to track actual progress against your initial plan.
"Less is more with a Gantt chart. If you cannot easily identify the critical path, highlight the current project status, and understand the overall timeline, the Gantt chart loses its value." – Marisa Browne, PMP-certified project manager, Traffix
Keeping a project on track requires consistent monitoring and a willingness to adjust the timeline as needed. Start by establishing a weekly status period at the beginning of the project and stick to it throughout. This routine ensures everyone stays on the same page and helps prevent minor issues from escalating into significant delays.
"A weekly status period works great for almost every project, big or small, but whatever status period you choose, pick it wisely and stick to it." – Bernie Roseke, P.Eng., PMP, President of Roseke Engineering
Use milestones as checkpoints to verify progress toward your objectives. Collaborative project management tools are invaluable here, offering real-time tracking and automated milestone updates that keep stakeholders informed. Regular team check-ins promote transparency and allow for timely adjustments when unexpected challenges arise. Reviewing milestones and performance metrics regularly will help ensure the project stays on course.
Once regular status meetings are in place, use them to measure progress against your planned milestones. This comparison provides a clear picture of where your project stands. For precise performance tracking, consider using Earned Value Management (EVM). Calculate the Schedule Performance Index (SPI) by dividing Earned Value by Planned Value. An SPI below 1.0 indicates delays, while a value above 1.0 shows you're ahead of schedule.
Another helpful metric is Percent Plan Complete (PPC), which tracks the percentage of tasks completed as planned each week. PPC highlights any accountability gaps, making it easier to address issues quickly. For lighting projects specifically, monitor key factors such as on-time fixture deliveries, prompt approval of shop drawings, and whether installation crews complete their zones on schedule.
Request updated progress schedules from contractors monthly - typically by the 20th of the following month - to ensure compliance with the contract. If significant changes occur in the critical path, require a written explanation detailing the cause and the plan for adjustment.
Clear communication is essential when timeline adjustments are necessary. Use your project management tool or Gantt chart as a central hub for real-time updates that all participants can access. Maintaining a response time of less than 48 hours for client decisions can help projects finish up to 20% faster. To streamline workflows, send critical documents like shop drawings directly to consultants while keeping all relevant stakeholders (e.g., distributors, electricians, contractors) in the loop.
"Projects where we maintain under 48-hour response times on client decisions finish 20 percent faster because trades aren't waiting around for clarification." – Pam Hutter, Principal, Hutter Architects
Visual tools, such as overlaid roadmaps showing mechanical, electrical, and lighting layouts, can help stakeholders anticipate and resolve potential conflicts. Set up automatic notifications for upcoming or completed milestones to keep everyone aligned without the need for constant manual follow-ups. Once a milestone is achieved, mark it as complete and archive it to build a historical record for future project evaluations.
Planning a realistic lighting project timeline means addressing practical challenges head-on and preparing for them in advance.
By following the steps outlined - such as defining the project scope, breaking work into manageable phases, setting clear milestones, accounting for constraints, creating visual roadmaps, and actively monitoring progress - you can minimize delays and stay within budget. These steps work together to keep your project running smoothly and avoid unnecessary setbacks.
Incorporating tools like three-point estimating with a 10%–15% contingency and ensuring quick client approvals (within 48 hours) are critical for maintaining momentum. Additionally, focusing on coordination during the design phase can help sidestep common on-site conflicts, which often lead to three-week delays.
More than just operational success, well-executed lighting projects can enhance safety, reinforce brand identity, boost workplace morale, and even influence revenue growth. By committing to thorough preparation and ongoing oversight, you’ll create a dependable timeline that delivers successful results for commercial, educational, or municipal facilities.
For more detailed guidance, revisit the earlier steps in this guide or reach out to Texas Lighting Consultants for tailored assistance with your project timeline.
To create a solid timeline for a lighting project, begin by gathering all key stakeholders to establish clear goals, requirements, and any potential limitations. This step ensures everyone is on the same page from the start. Once that’s done, lay out a detailed plan that breaks down tasks, milestones, and dependencies. Be sure to include essential phases like design, procurement, installation, and testing.
A visual schedule can be incredibly helpful here. Use it to map out tasks, assign responsibilities, and set achievable deadlines. As the project progresses, keep an eye on the timeline, making adjustments as necessary to handle unexpected delays or changes. This approach keeps everything moving smoothly and helps ensure the project wraps up on time.
To keep your lighting project on schedule and avoid unnecessary delays, start by crafting a detailed and realistic timeline. Make sure it includes all the key milestones and any dependencies. Don’t forget to build in some contingency time - this buffer can help you stay flexible when unexpected challenges pop up.
Partnering with experienced professionals can also make a huge difference. Skilled project managers can take care of procurement, technical support, and logistics, which helps simplify the process and tackle any issues quickly. At the same time, keeping open lines of communication with all stakeholders ensures everyone stays on the same page, making it easier to spot and address potential problems early.
With solid planning, expert guidance, and clear communication, you can minimize risks and keep your project running smoothly.
To plan and manage the phases of a lighting project effectively, a variety of tools and methods can help keep things organized and on track. Project scheduling software is a great way to create detailed timelines, laying out tasks, dependencies, and deadlines to ensure the team stays aligned.
Another useful method is the Work Breakdown Structure (WBS), which provides a visual hierarchy of all project components. This makes it easier to organize tasks and track progress without missing any details.
For more complex projects, the Program Evaluation and Review Technique (PERT) can be particularly helpful. It analyzes task dependencies and uncertainties to estimate timelines more accurately. Together, these tools enhance visualization, resource allocation, and execution, making it easier to hit milestones efficiently.
We’re a HUB-certified Texas lighting company specializing in surveys, calculations, and installations for government and contractor projects.
© 2025-26 | Texas Lighting Consultants | All Right Reserved.